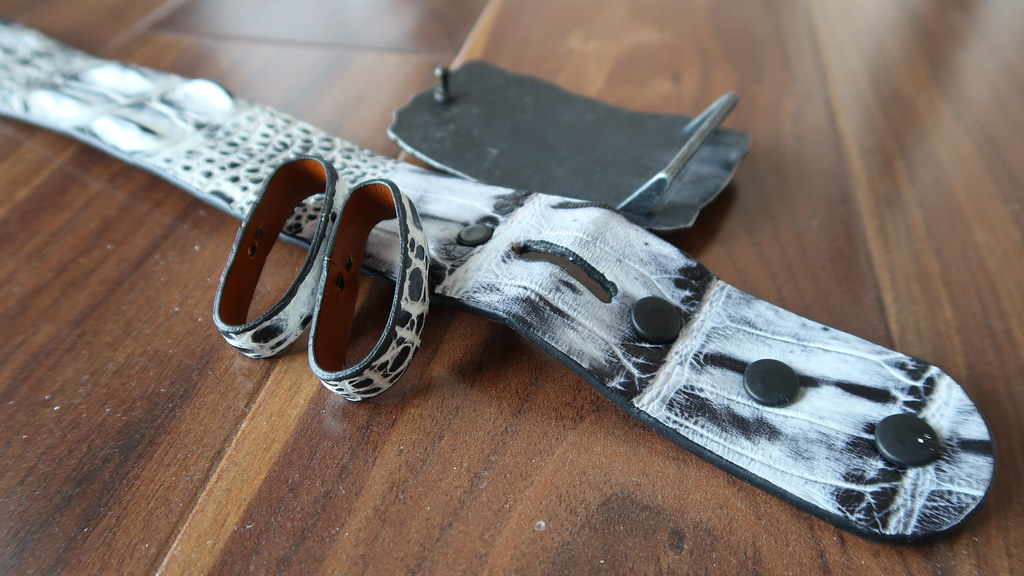
Review: Jacob Hill by Piedmont Leather – White smoke hornback saltwater crocodile belt

This post is over 7 years old and may contain information that is incorrect, outdated, or no longer relevant.
My views and opinions can change, and those that are expressed in this post may not necessarily reflect the ones I hold today.
 

Disclosure of non-disclosure: I was not compensated in any manner for this review and do not plan to accept compensation after-the-fact.

This may sound a bit weird coming from someone who reverse-nickel-and-dimes as much as possible in order to optimize savings, but I’m a bit of a luxury goods enthusiast, specifically when it comes to leather products. I love the idea of getting full grain leather products and having them age along with me, watching as the patina forms and tells a story of where it’s been and how it’s been used.

With that being said, it probably shouldn’t be a surprise then when I grabbed a white smoke hornback saltwater crocodile belt from Jacob Hill Leather Co. I have a small set of leather accessories, but none of them were of crocodile, so I thought this would be a good opportunity to induct the reptile into my collection. It took right around two weeks to get to me (including made-to-order production and standard ground shipping); it arrived in my PO box yesterday, and I picked it up today.

Jacob Hill by Piedmont Leather - White smoke hornback saltwater crocodile belt

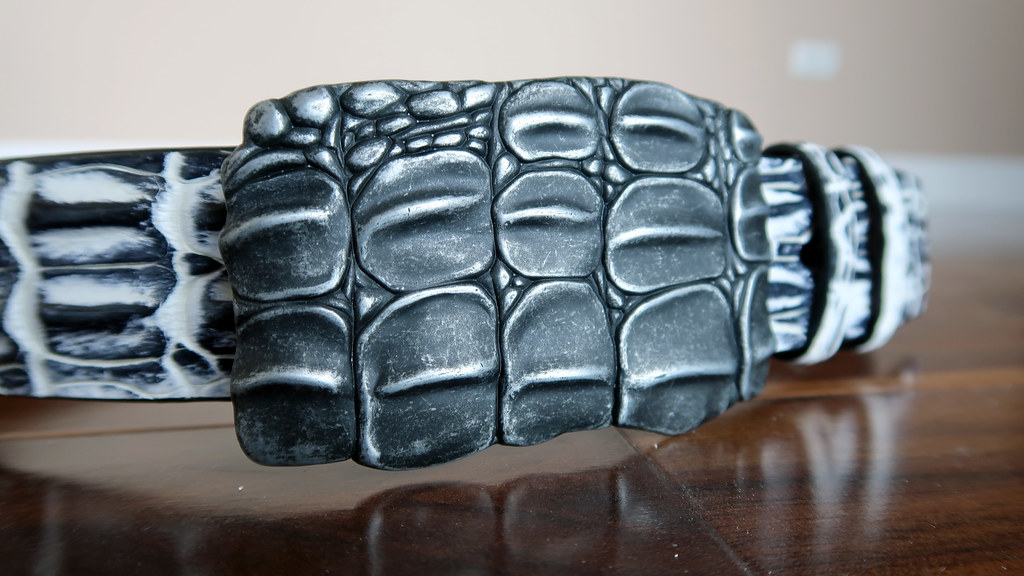
The belt normally comes with a standard buckle, but I specifically requested an upgraded belt buckle to a more durable one made out of cast aluminum and molded in the shape of hornback scales. The first thing I noticed about the buckle was just how large it was—it actually looks quite aggressive and is pretty wide.

Jacob Hill by Piedmont Leather - White smoke hornback saltwater crocodile belt

The belt itself had the rough-but-smooth texture that I would expect from crocodile leather. It has all the unique wrinkles and folds that you would expect from a real leather product, and twisting it into itself back and forth gives the expected “it’s alive” visual, where it seems like each scale and each part of the skin is moving both together and independently at the same time.

(Quick tip: This twisting and folding method is a very easy way to tell whether or not crocodile and alligator leather is real; fake and engraved pattern leather will appear to always move in a single piece and will often wrinkle and crease in strange places, such as through the center of scales.)

Jacob Hill by Piedmont Leather - White smoke hornback saltwater crocodile belt

Of course, because this is a hornback belt, it comes with horns—mine had four large, pronounced horns, followed by a row of smaller ones along the remainder of the belt. The cut of the belt made it so the placement of the horns doesn’t interfere with your pants’ belt loops and doesn’t make it difficult to thread onto your waist.

Jacob Hill by Piedmont Leather - White smoke hornback saltwater crocodile belt

The backside of the belt is lined with standard brown leather (which is good, because I’d imagine you wouldn’t want the pattern of crocodile jutting into your waist). It comes with a wealth of natural wrinkles and imperfections that true leather enthusiasts will love, and it’s finished off with a tasteful en­grav­ing of the Jacob Hill logo, along with a reminder of what type of leather you’re wearing.

Jacob Hill by Piedmont Leather - White smoke hornback saltwater crocodile belt

If you want to mix up your belt buckle, it’s very easy to disassemble—there are three snaps that hold the tip in place, and undoing those snaps will allow you to slide off the rings and buckle.

This is useful because I noticed that, when wearing and centering a belt buckle as large and pronounced as the upgraded cast iron hornback one, the extra rings might get in the way of your first belt loop if you don’t skip it and start threading into your second belt loop. I like the visual touch that the rings provide, so I will likely keep them on, but if you want a more secure grip, you can remove the rings and slide the belt into the first belt loop all the way up snug to the buckle.

Another very minor complaint I have about the belt is the backside of the snaps that hold the buckle and rings into place. They look and feel like they’re made out of plastic, and although they are functionally fine, it’s not really something that I expected being used for a belt of this caliber. Regardless, this is probably something that will only bother someone with the utmost attention to detail; the plastic parts of the snaps face inward towards your waist, and you most likely will forget that they’re even there.

As I said at the beginning of the review, I was not paid to write this review and this is not part of a partnership or sponsorship—I wrote this simply because I was satisfied with the belt. Unfortunately, this does mean that I don’t have a special discount code to offer you. However, I noticed that their website has a dedicated section for specials where they run substantial discounts on various different products, so I recommend checking that out.

As for me, after browsing their website, I noticed that they make wallets as well, so I plan on making another purchase—just not right now, because if I don’t pace myself, I foresee easily being down a couple thousand dollars before I know it…


—§—


There’s a class action lawsuit against General Motors for their 8-speed automatic transmission

This post is over 7 years old and may contain information that is incorrect, outdated, or no longer relevant.
My views and opinions can change, and those that are expressed in this post may not necessarily reflect the ones I hold today.
 

Back in July 2018, I bought a new GMC Canyon as my first personal vehicle. I was very fortunate that I was able to get the exact vehicle that I wanted, as I perceived the GMC Canyon as essentially the best-in-class vehicle that fit my exact needs. I took my enjoyment of the vehicle to the next level and also added on a handful of modifications.

This isn’t quite the best photo, but it’s the only one I have handy that hasn’t been posted on my blog before (but you can find more pictures in other blog posts):

Making a stop at the Grewal Business Center in Baker, CA after driving through the Mojave Desert from Las Vegas in a rainstorm

Unfortunately, a few months after purchasing the truck, I started having some problems with the transmission. At the time, I didn’t really know what was wrong, but I new something was definitely abnormal, because I had driven a lot of vehicles before, especially considering that I’ve done enough car rentals for work to earn myself elite status with Enterprise Rent-A-Car. In my half-year owner’s review, I mentioned this problem; here’s an excerpt from that blog post:

The transmission is slow and lurches the vehicle when the fluids are still cold. There’s an option to display transmission fluid temperature in the gauge cluster, and whenever it’s below ~100°F, the transmission takes longer to shift to different gears. This is particularly noticeable when you’re just starting up the vehicle and making your first stop of the day. If you do not come to a complete stop then wait a few seconds (and instead just slow down and roll through a stop sign), the vehicle will hiccup and lurch when you ease your foot off the brake and begin accelerating again.

When I took it into the dealership, they did no work on it and sent it right back to me with the commentary, “Performed complete vehicle DTC scan. No codes or service bulletins found. Could not duplicate concern. Vehicle is operating as designed.” At that point, I wasn’t sure if the mechanic had someone else warm up the vehicle and transmission fluid so much that the problem went away, he was just incompetent and didn’t recognize the problem, or he was intentionally ignoring the blatantly obvious problem.

 
Yesterday when I got back from hiking, I was browsing the Internet while recovering and came across a class action lawsuit against General Motors, the manufacturer of the GMC Canyon. I got curious and looked into it, seeing as I am a General Motors customer, and got extremely intrigued when I saw that it was regarding a defect in the 8L90 and 8L45 8-speed automatic transmissions. Apparently, the vehicles affected were:

  • Chevrolet Colorado, Chevrolet Silverado, Chevrolet Camaro, Chevrolet Corvette
  • GMC Canyon, GMC Sierra, GMC Yukon
  • Cadillac ATS, Cadillac CTS, Cadillac CT6, Cadillac Escalade

At this point, figurative red and blue lights were flashing in my brain as I began digging through my vehicle’s purchase paperwork. Lo and behold, my 2018 GMC Canyon had an 8L45 transmission and was an affected vehicle for this class action lawsuit. According to the “GM facing class action lawsuit over transmission problem” page on ClassAction.org, the problems that others are having are the same as mine:

“When a driver accelerates or decelerates, the cars will reportedly hesitate and then shudder, jerk, clunk, or ‘hard shift’ when the automatic transmission switches gears. This may also occur when the vehicles are accelerating in a single gear and not necessarily switching gears.”

I got in touch with one of the class action lawyers, and I’m in talks with them right now providing relevant information, so hopefully this ends up doing something for me. Even though the transmission sucks, I still really like the truck, and I’ve already put in a good chunk of money modifying it to my desires, so it’s not like I want to completely bail out and get rid of the truck. Ideally, I just want to avoid a situation where I ding 60,001 miles, my powertrain warranty ends, and my transmission proceeds to immediately implode.


—§—


After living in Las Vegas for over a year, I finally went to Red Rock for the first time

This post is over 7 years old and may contain information that is incorrect, outdated, or no longer relevant.
My views and opinions can change, and those that are expressed in this post may not necessarily reflect the ones I hold today.
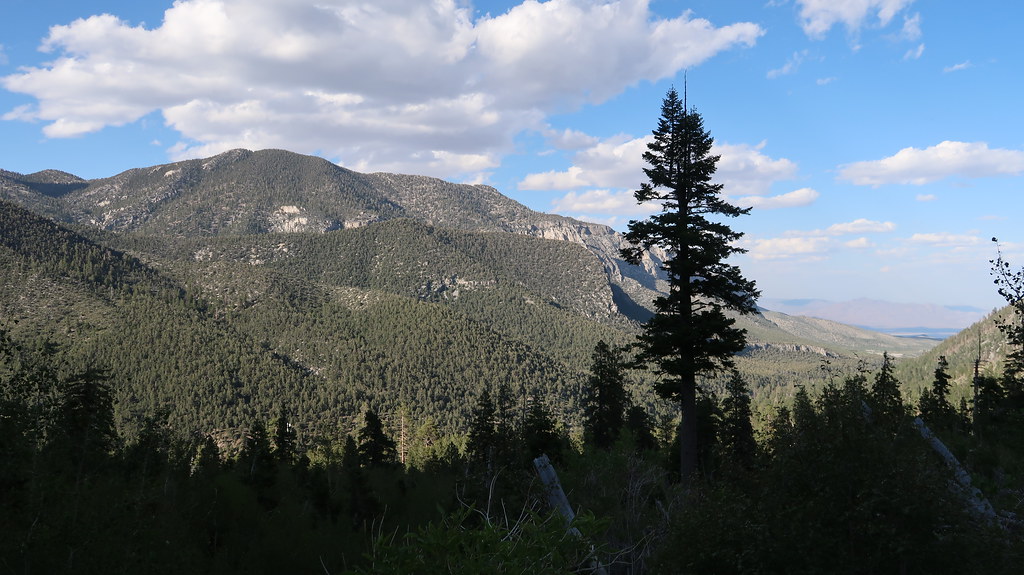
 

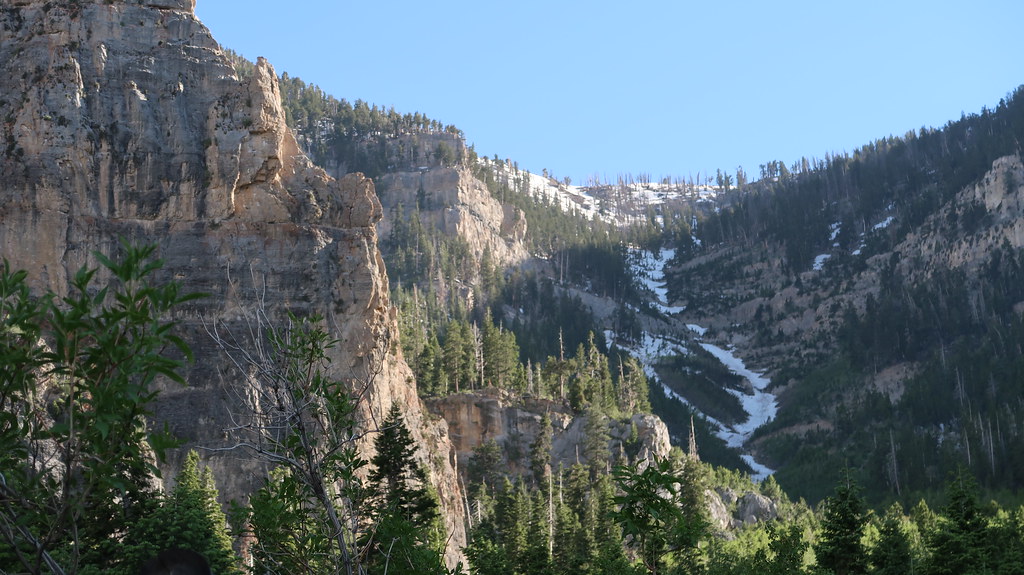
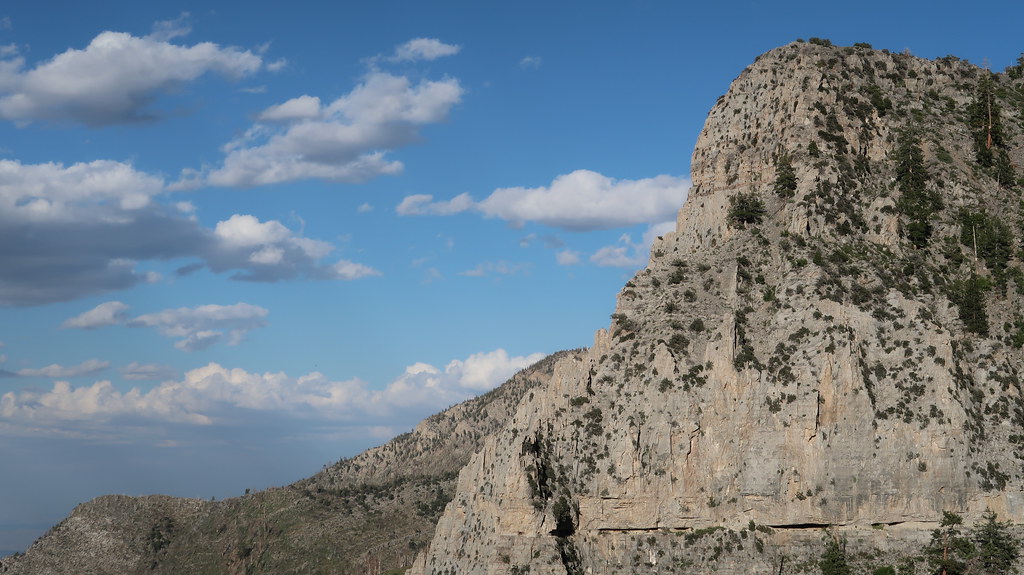
📍 Calico Tanks, Red Rock National Conservation Area, Las Vegas, NV, USA

Red Rock Canyon - Sandstone Quarry

Red Rock Canyon - Calico Tanks

Red Rock Canyon - Calico Tanks

Red Rock Canyon - Calico Tanks

Red Rock Canyon - Calico Tanks

Las Vegas from the summit of Calico Tanks

Red Rock Canyon - Calico Tanks

Red Rock Canyon - Calico Tanks

Full album: https://www.flickr.com/photos/adamparkzer/sets/72157678216588387


—§—


I finally installed an SSL certificate on my website

This post is over 7 years old and may contain information that is incorrect, outdated, or no longer relevant.
My views and opinions can change, and those that are expressed in this post may not necessarily reflect the ones I hold today.
 

Back when I started really getting into web development and coding, SSL certificates and having your website start with https:// wasn’t really a common thing. I helped run a few other websites for e-commerce companies, and they needed SSL certificates to ensure their clients’ information wouldn’t be stolen, but I personally didn’t sell anything on my own website, so I never bothered with it. … This was nearly two decades ago.

Nowadays, having an SSL certificate is considered normal and standard for all websites, even if you don’t sell products. They’re also free now, very contrary to having to pay a decent chunk of money for them a decade or so ago. I like to keep up with modern trends and make sure things are secure, but I hesitated from immediately implementing an SSL certificate – not because I didn’t care to do it, but because I realized there was something I did a handful of years ago that would make SSL certificate implementation extremely difficult.

Namely, when I set up my .htaccess file to have rewrite rules for formatting my website’s URLs, I did so in a very disorganized and makeshift manner that was incredibly inefficient. Basically, I dreaded having to go back and try to understand my thought process from several years ago in order to reverse engineer it, implement the rewrite rules properly, then make sure there were no infinite redirect loops that would keep forwarding the https:// URLs to http://.

It was obviously a waste of time that could’ve been avoided if I did it properly the first time, but I managed to put in an extra 15 or so minutes to get everything fully figured out and for the SSL certificate to work properly. … Or so I thought.

My next problem? When I went to my brand new https:// website, Google Chrome insisted on telling me that the website, although it had an SSL certificate, wasn’t actually secure – it claimed that I was loading stuff from insecure sources. That was definitely reasonable, and I spent an additional 15 minutes combing through the rest of my code and making sure all my scripts and extra includes were being called securely via their https:// versions.

But that still didn’t work.

And here ensured a series of events worthy of Benny Hill music, where I went around in circles trying to figure out why my website kept calling an insecure version of my header font. It ended up being a combination of the font being hosted in an unexpectedly different theme folder for some reason, combined with the fact that I use both W3 Total Cache and Cloudflare caching at the same time for website speed optimization.

After spending yet again an extra additional 15 minutes on that alone, after nearly an hour, my SSL certificate was installed and active on my website.

As for the lesson of the day… make sure you keep a log of notes of all the stuff you’ve done in the past. If not, then at least do things correctly the first time.


—§—


Northwest Las Vegas during a rainstorm

This post is over 7 years old and may contain information that is incorrect, outdated, or no longer relevant.
My views and opinions can change, and those that are expressed in this post may not necessarily reflect the ones I hold today.
 

Las Vegas was covered in storm clouds today that blocked the sun, but the clouds only extended across the city and not out by the mountains. This engulfed the city in darkness, but the mountains were still sunny. Here’s a view from central Las Vegas facing northwest:

Northwest Las Vegas during a rainstorm

Interesting visual.


—§—


Re: “How do you avoid spending all your leftover money?”

This post is over 7 years old and may contain information that is incorrect, outdated, or no longer relevant.
My views and opinions can change, and those that are expressed in this post may not necessarily reflect the ones I hold today.
 

Within the realm of finances, one of the more relatively frequent questions I get asked is how to avoid spending all your leftover money. Everyone knows by this point that they need to save money, but with a nice, padded bank account, it can be very easy to “forget” to save a set amount during a particular month, and it’s even easier to feel “accomplished” seeing a large sum in your savings account and thinking that you already have enough.

I am by no means rich, but I personally have fallen into this scenario before, and the best recommendation I have is to “create expenses.” I’ll explain.

I am very attentive and “obedient” when it comes to addressing expenses. I make sure everything is paid on time, but not so early that I miss out on interest yield. I never forget about any obligations, and I plan ahead to ensure that obligations continue to be met even in potential emergency worst-case-scenario situations. With that being said, I’m essentially exploiting the way my brain works by triggering that sense of responsibility by creating fake expenses.

As a preface to this, the “my savings account is big enough” argument should be completely invalidated if you have less than 6 months’ worth of living expenses saved up. A lot of people say 3 months’ worth is enough, but remember, the emergency itself that is causing you to lose your source of income will likely also directly drain your funds as well (for example, an injury that will rack up medical expenses), and there is no guarantee that you will recover and return to normal in a maximum of 3 months.

Going back to the main topic at hand, let’s create an example and say your monthly income is $5,000. Your expenses in this example are as such (heavily grouped and rounded for ease of calculation):

Rent (or mortgage plus other homeowner expenses)$1500
Utilities (power, gas, water, sewer, trash, phone, Internet, etc.)$300
Medical insurance (health, dental, etc.)$300
Vehicle (loan/lease, auto insurance, fuel, maintenance, etc.)$800
Student loans or other miscellaneous installment loans$200
Food (groceries, restaurants, etc.)$500
Personal care (haircut, gym membership, etc.)$100
Household products and other goods$100
Subscriptions (Amazon Prime, Netflix, Spotify, credit card annual fee, etc.)$50
Travel and other leisurely activities$150
Gifts and charitable donations$100

In this example, you have $4,100 in monthly “expenses,” leaving you with $900 remaining – I put “expenses” in quotation marks because you’ve already taken into account a very large food budget for eating out at restaurants, as well as an additional leisurely spending stipend, as “expenses.” Most people know that all $900 should be going straight into savings, but it’s easy to add an extra $50 here and an extra $100 there and end up shrinking your savings amount.

First of all, make sure you’re not forgetting about any expenses. Are you an independent contractor who runs their own business like I do and doesn’t get income tax withheld? Even if you’re a godlike optimizer of deductions of business expenses, you should be expecting to set aside at least $500 or so per month for income tax, unless you want to go from tax avoidance dangerously close to tax evasion. Are you saving for retirement? Making maximum contributions to an IRA means another ~$500 per month. Combine those two extra items you forgot, and suddenly, you’re short of money, have no savings, and need to cut back on other expenses.

Similar to how you’re budgeting leisure and luxury as expenses into your spreadsheet, also itemize savings as different, individual expenses instead of just lumping everything together as “savings” or “leftover.” Set specific goals for yourself on where each component of your savings is going, and create different savings accounts (where applicable) to keep track of each individual goal (savings accounts are usually either free or have very low daily balance requirements to waive the monthly fee).

Similar to the expenses above, here are some very simple example savings goals (mostly relevant to someone around my age) that you can tack onto your budgeting spreadsheet in the form of “expenses” to turn up the pressure to set aside money for said goals (as well as their corresponding monthly cost):

Maximum $5,500 yearly contribution to a traditional or Roth IRA$458
Maximum $19,000 yearly contribution to a 401k$1583
20% down payment on a $350,000 house purchase in 10 years$583
$15,000 for a wedding in 5 years$250
$15,000 for the first year of newborn baby expenses in 5 years$250
$35,000 Bachelor’s degree fund for a newborn starting school in 18 years$162

Being able to cover all that pushes you into the six-figure yearly salary range, and then you end up getting more expenses piled on just by the fact that you’re richer – you’ll be pushing a 24% tax bracket, you’ll need to purchase more insurance to protect your life and your investments, etc. As you can see, things can very quickly spiral out of control, and it’s all about perspective – you can always put yourself in a situation where it feels like you never have enough money.

So, coming full circle, how do I personally avoid spending all my money? I expand my budgeting spreadsheet to include items similar to the second table, but custom-catered to me specifically. My personal budgeting spreadsheet goes nearly 100 rows deep, and at the end of each month, I “spend 100% of what I earn” … though after reading this post, you know that that’s just an illusion to ensure I’m financially set for my future.


—§—